Guide to Launching your own cryptocurrency

Cryptocurrency has lately been a hot topic due to massive monetary gains and hype surrounding it. I am sure like me many others wonder "How cool it would be to have a crypto token of your name". A lot of folks worry if it is too technical and cumbersome to make a cryptocurrency. Well, hopefully by the end of this article the answer is going to be "NO" and with that said,we all are going to have our own "crypto-token" on the blockchain.
The idea and goal for this tutorial is to create interest for everyone (kids, students, anyone) who want to dabble and build applications on top of the blockchain to learn the basics by taking first steps.
Things we need before we start:
1) Install Metamask wallet — Metamask wallet is a web extension which is your gateway and identity to the majority of crypto. You can use this to spend, spend, receive and nearly do anything with crypto. Think of it as a 1-click (Google/Fb) login for all your web pages but better.
2) Metamask-Binance Smart Chain: Make sure your metamask wallet is configured to binance smart chains. Use this guide to do so - Should take under 2 minutes. You can also click this link to pancakeswap which will auto fetch Binance chain details for you, hit approve (i love this mini-hack).
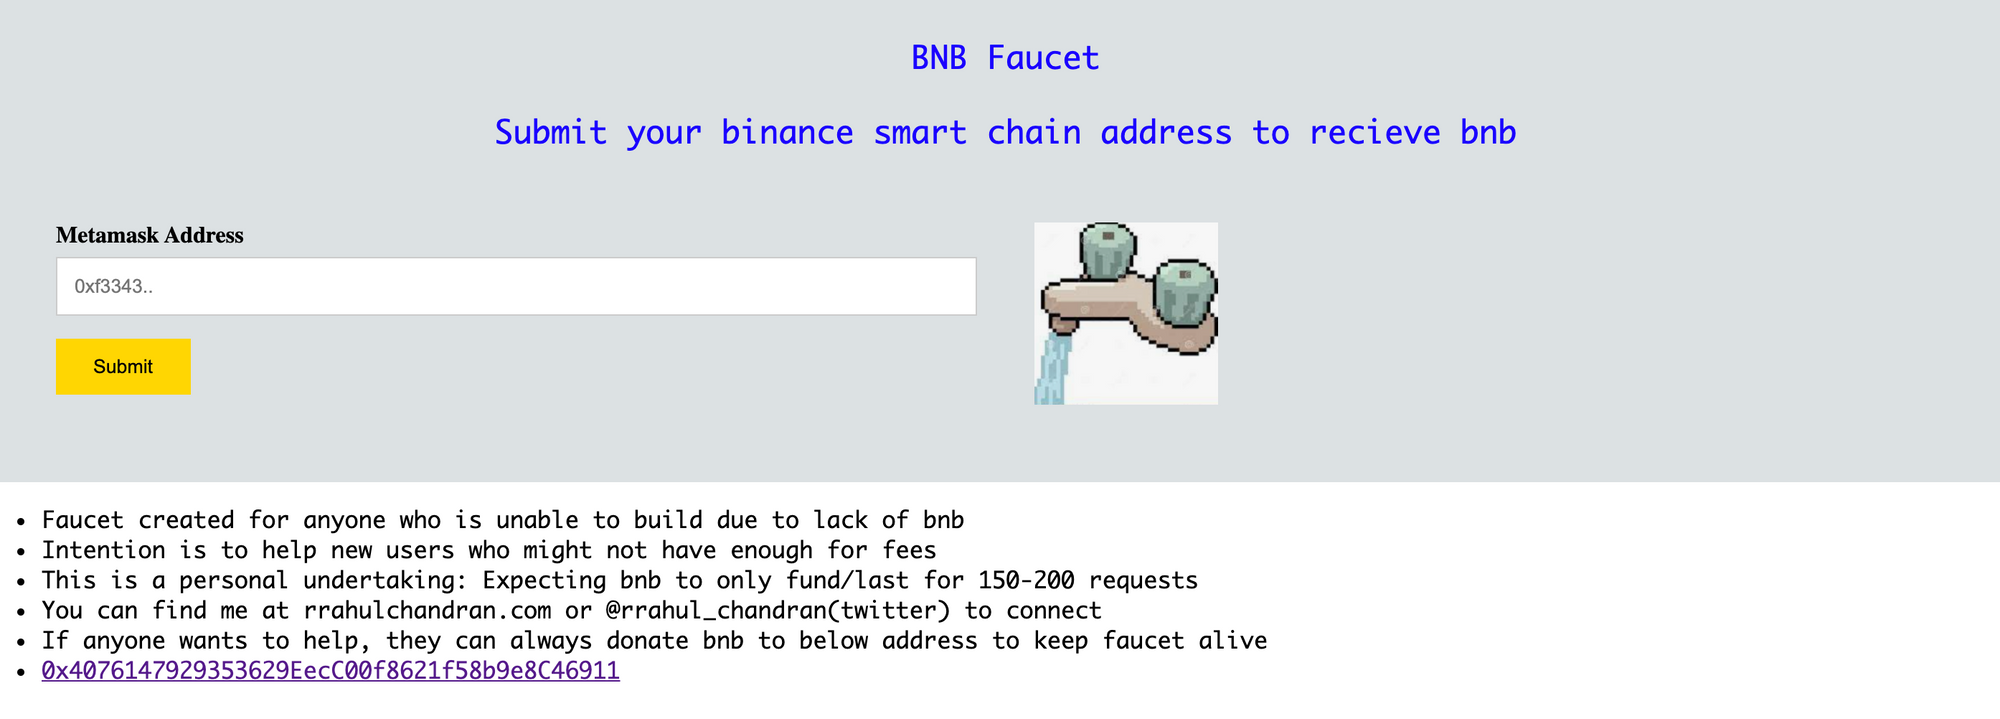
3) Bnb(fees) to transact – Some amount of fees(money/bnb) is required to launch a crypto token($0.05-$1). For anyone who might not have access to bnb, I have created this faucet to bootstrap first 150-200 users.
Link to the bnb faucet (adblocker will throw you a error)
All the tokens can also be created on testnet instead of mainnet, if you want to learn on testnet, steps are exactly similar while binance has its own faucet to give you some test tokens. These tokens cannot be used/sold/bought on main-net.
Well, let's begin the process of launching our crypto-token.
We will be choosing Binance smart chain due to the current high costs/fees associated with Ethereum. However, the same exact tutorial can be used to build tokens on the Ethereum chain, Matic chain(Extremely cheap), and/or binance chain.
Step 1) Getting ready -Import data from Open Zeppelin
a) Visit our friends over at OpenZepellin: Link Here and copy the code.
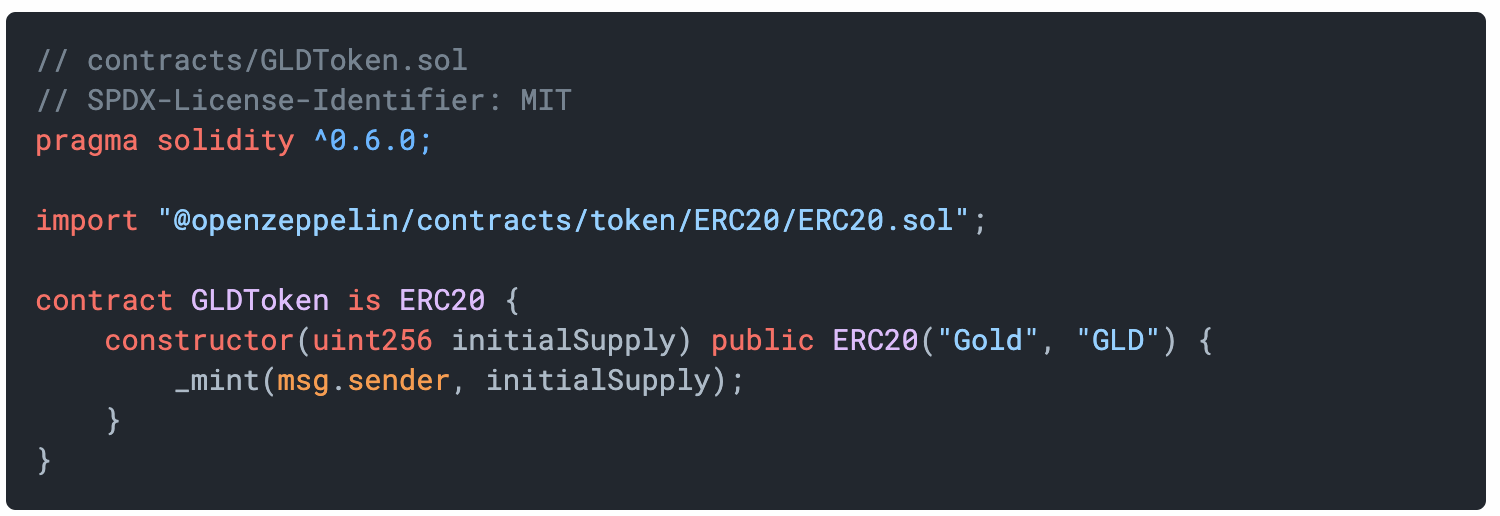
b) In case you want an exact similar code I used(see below). The difference here is the version of solidity and link to the import website but shouldn't matter.
pragma solidity ^0.8.0;
import"https://github.com/OpenZeppelin/openzeppelin-contracts/blob/master/contracts/token/ERC20/ERC20.sol";
contract Owley is ERC20 {
constructor(uint256 initialSupply) public ERC20("TOKEN", "tok") {
_mint(msg.sender, initialSupply);
}
}
c) Replace "Token" with the name you would like to have for your crypto
d) Replace "tok" with 3 letter abbreviation for your crypto.
Example: Bitcoin(name) = btc(token abbr) , Ethereum(name) - eth(token abbr)
I went for Owley(name) = owl(token abbr)
e) Keep a copy of the code in your notepad or choice of the document. We will be using it soon.
Step 2) Gearing up - Setting up Remix environment
a) First step would be going to a website called remix.ethereum.org

b) In your workspace, create a new file for yourself named "bep-20.sol"
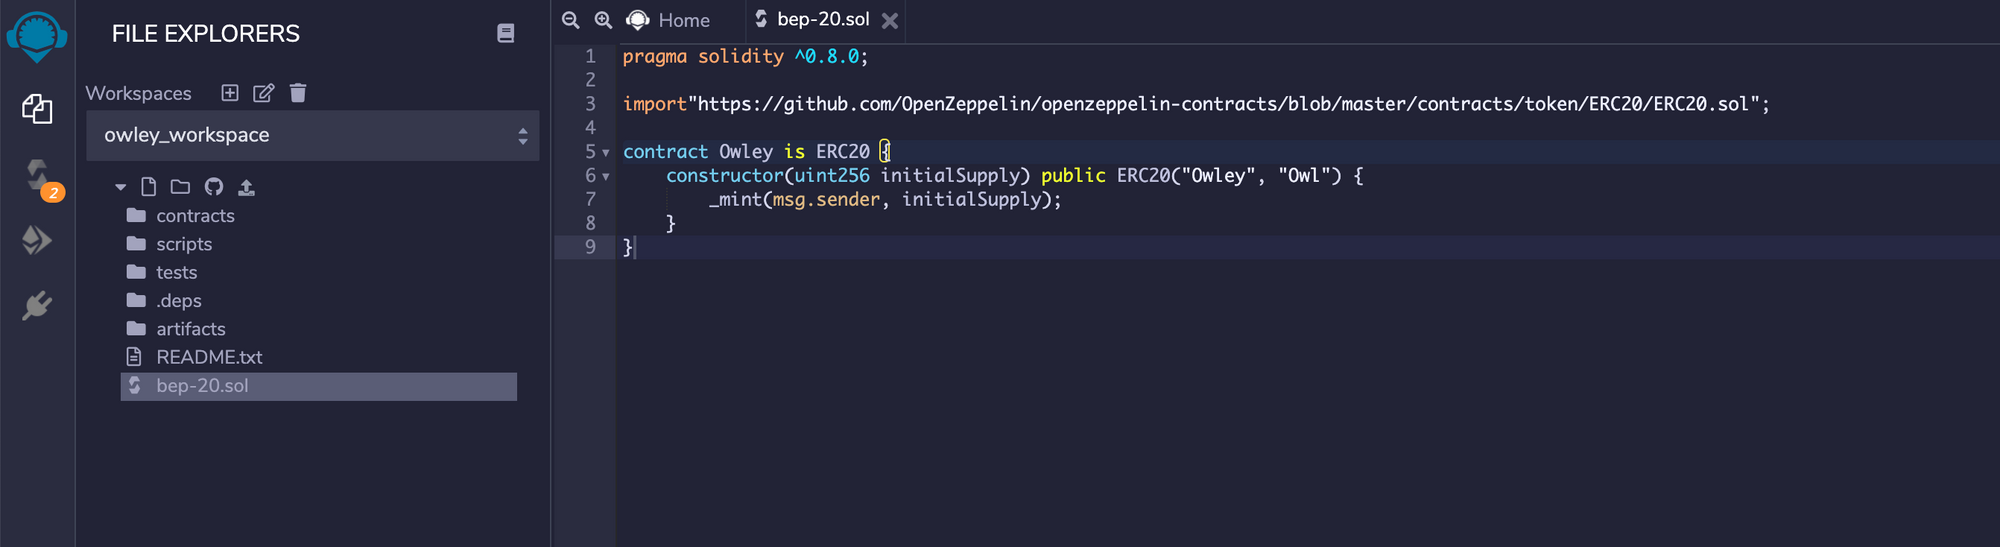
c) Insert code here from Zepplin, and update token name and symbol.
d) Select solidity compiler and Click Compile bep-20.sol button.
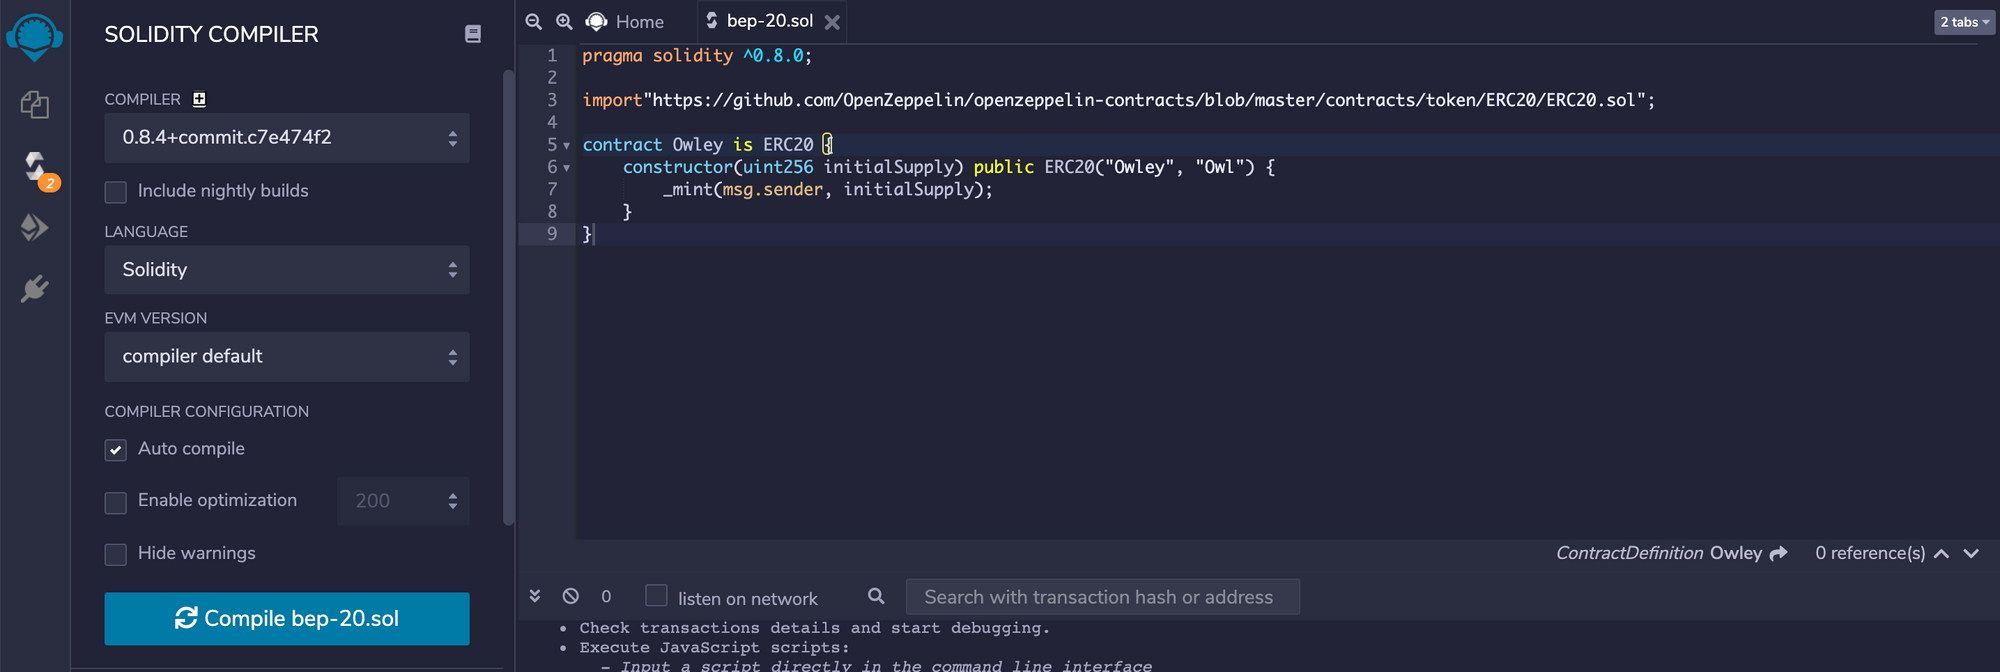
e) Select deploy & run transactions and get ready to deploy your token.
– Environment: Choose Injected Web3
– Account: Should be Metamask address(should auto-populate ideally)
– Contract: Choose bep-20.sol (one we just created)
– Initial Supply: Add 100 (or any amount- Field is for total number of coins)
– Click Deploy

Step 3) Post Clicking Deploy
a) Metamask will ask for your permission - Press Confirm
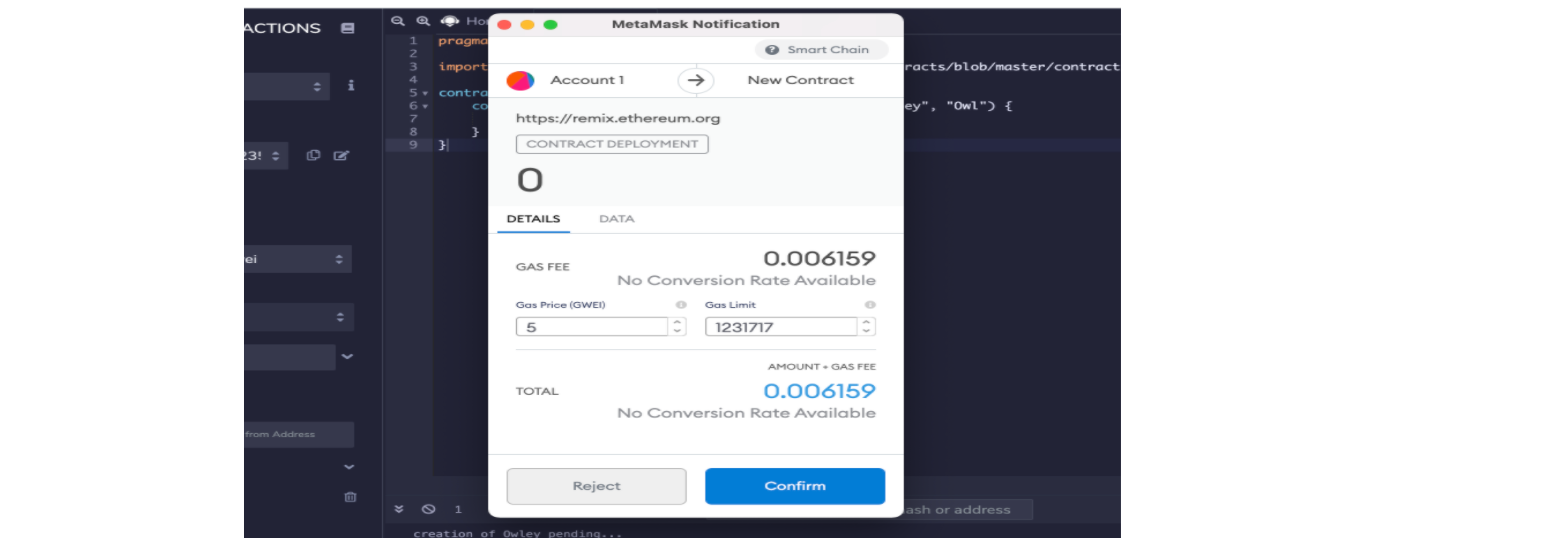
b) Make sure you have some bnb (bnb is used to cover fees).
c) Check the token status, After confirmation(Network validating us), you have your own token on now on the blockchain. Yaaaaayyy 🎉
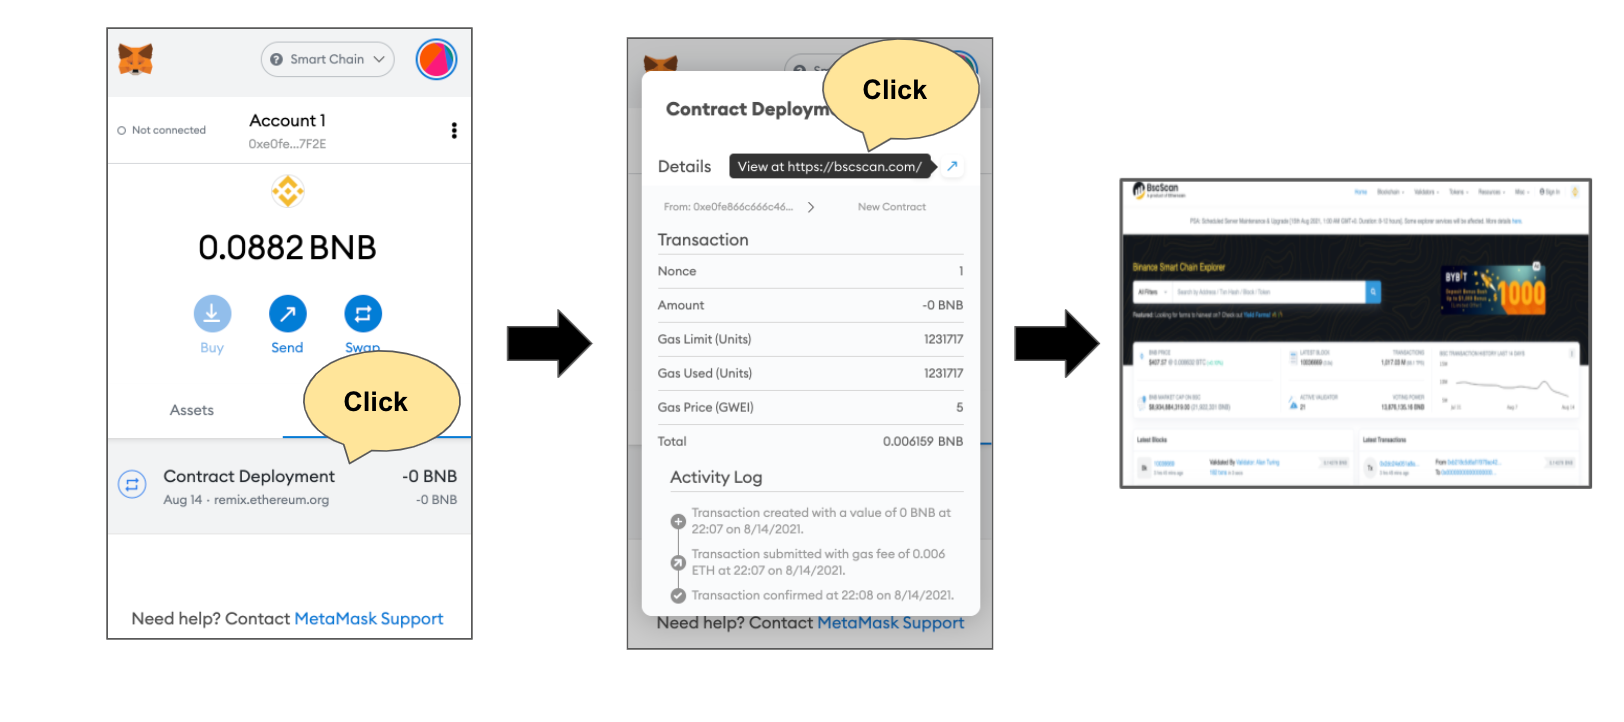
d) Now your token is ready and available on the binance chain, we will now learn how to find our token and share it.
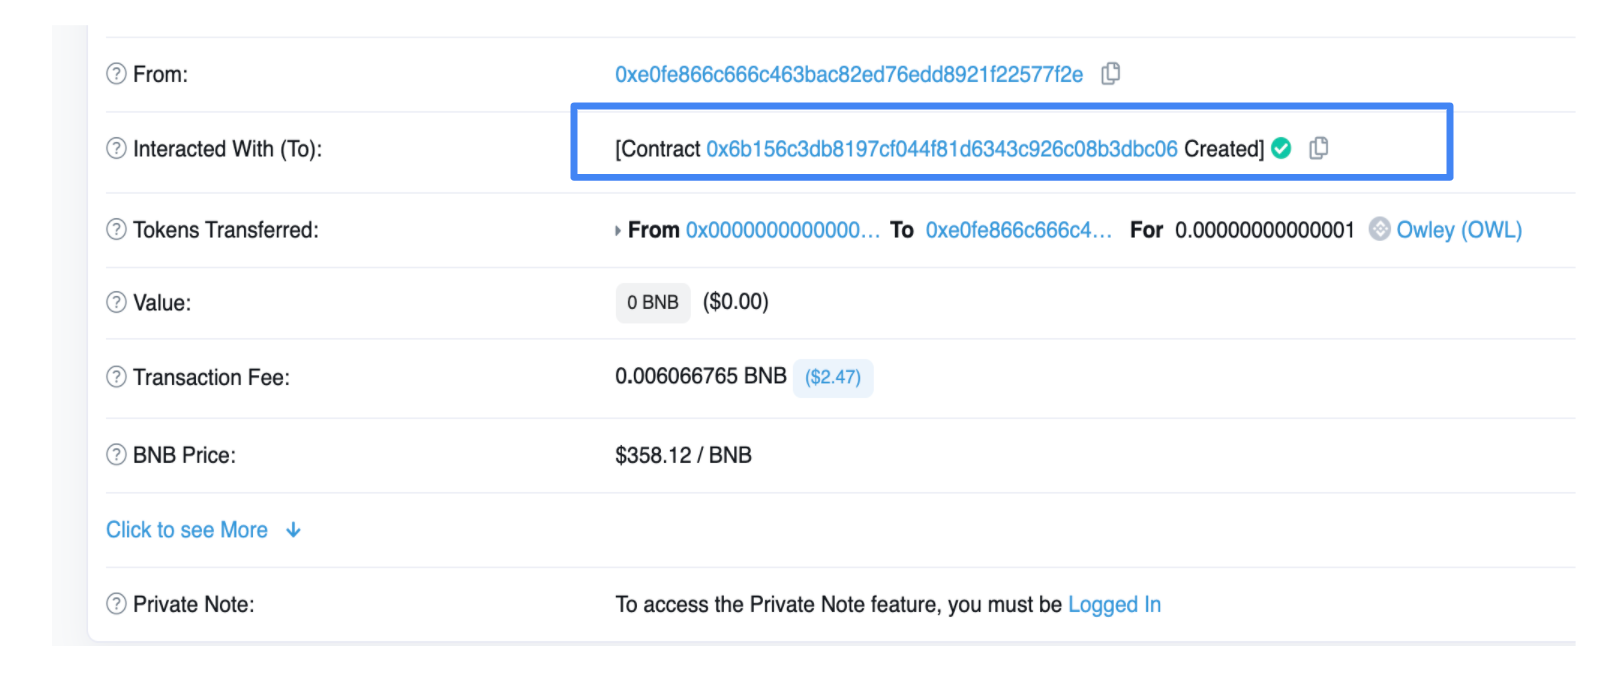
e) Here are few important things to notice:
– Contract: contract address for your token [Copy it]
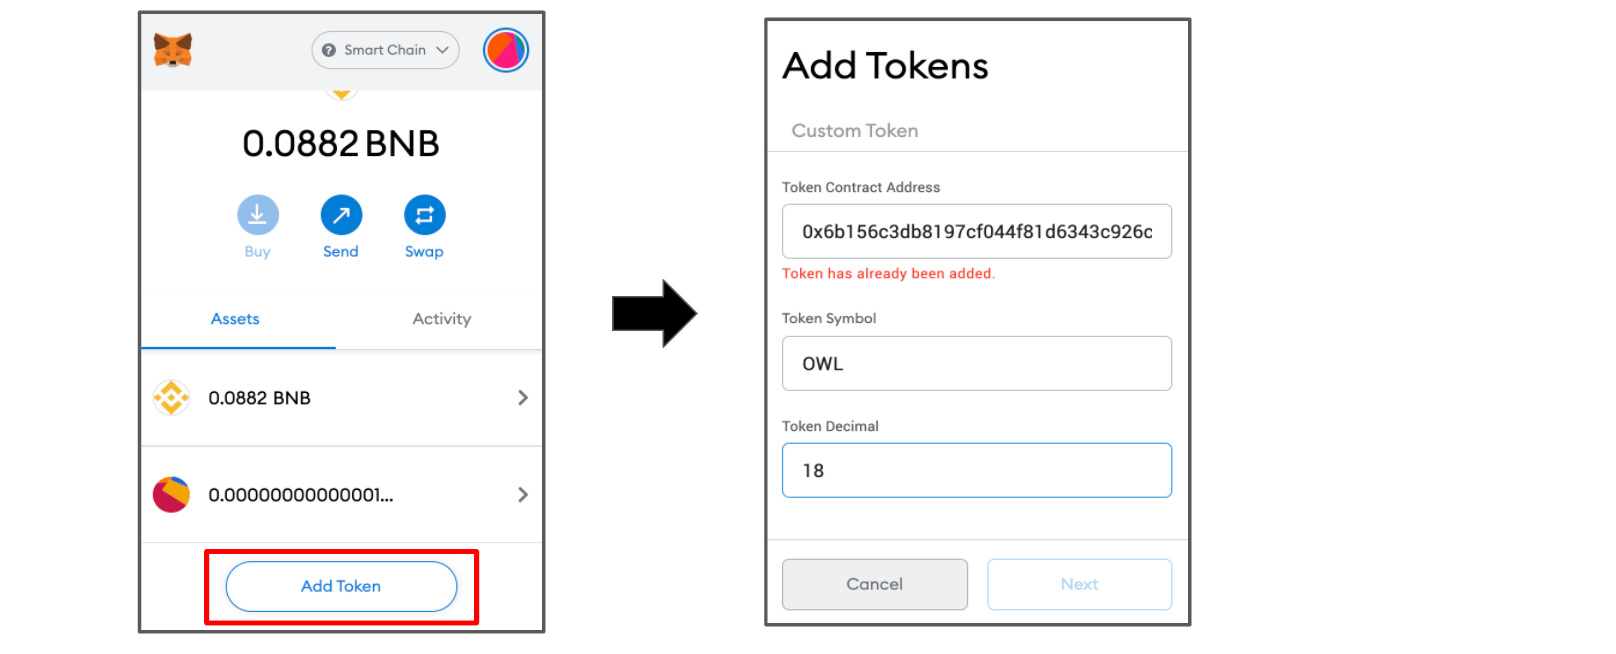
– Add Token to your Metamask: Go to add tokens and paste the contract.
f) Now the fun part. Anyone in the world can now view your token on the Binance chain. You can share it in the following ways:
1) Ask to add it to their metamask Binance wallet( send contract address)
2) Check your metamask address and paste it on bscscan. You can view it on your address UI.
3) Visit bscscan to show your friends your token or ask them to add your tokens via metamask. (Your contract address is token's identity)
Congrats, now you have your token on binance blockchain. Repeat the same steps to build your token on Ethereum and polygon(Matic chain).
If you are interested, there is a wealth of free information available to teach you next steps. Learning more will allow you to add features to your coins - send, receive, transfer, full blown application, etc. So keep learning and keep building.
Interested in learning more? Check out some amazing blogs
1) Coinbase Basics, 2) Binance Academy, 3) My personal favorite
If you believe in cryptocurrency or the underlying technology, you can also buy and invest via Coinbase and Binance, among several others.
Note: Crypto, in general, is/has been very volatile so please read, learn and understand before investing. Investing is not a prerequisite to building.